At work I use a MacBook Pro because that’s what they give us. At home, my desktop is Windows because of Windows Media Center and gaming, but I also recently rescued a Dell laptop that now has Ubuntu on it. While setting up that laptop for Android development, I ran into a couple of gotchas and found some shortcuts; so when I set up a new VM for a new project on my desktop, I decided to document the steps for reference.
To wit, at the end of the following procedure, we’ll have Android Studio running on Ubuntu 14.04.3 (Tired Trampoline) on VirtualBox 5.0.10. If you need a lighter VM, these instructions also work with Lubuntu.
- Download VirtualBox (for this guide, 5.0.10), if you don’t have it
- Set up a new VM
- Download the Ubuntu Desktop ISO (for this guide, 14.04.03)
- Load it into the VM’s optical drive, boot up the VM, and start the install
- After answering the setup questions in the beginning, go watch TV for a while
- When it’s done, eject the install ISO from the VM and reboot
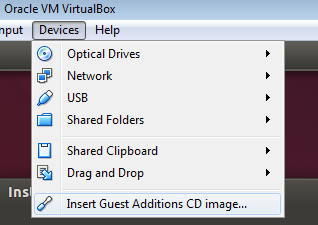
- It’ll boot up in glorious 640×480 mode; insert the Guest Additions CD image, to do stuff like allow you to use a decent desktop resolution:
- A dialog will come up allowing you to automatically run the script on the disk, but if something goes awry, open a terminal, go to the disk and manually run the script:
cd /media/{username}/VBOXADDITIONS*
sudo ./VBoxLinuxAdditions.run
- A dialog will come up allowing you to automatically run the script on the disk, but if something goes awry, open a terminal, go to the disk and manually run the script:
- Reboot the VM
- Change the display resolution to something sane (System Settings -> Displays)
- If the Unity side taskbar annoys you too, make it auto-hide (System Settings -> Appearance -> Behavior; enable workspaces too) and install Cairo dock:
sudo apt-get install cairo-dock - Install Oracle the Java 8 JDK — not OpenJDK, because AndroidStudio doesn’t like that as much. You can do this easily thanks to the WebUpd8 team:
sudo apt-add-repository ppa:webupd8team/java sudo apt-get update sudo apt-get install oracle-java8-installer - If you’re running 64-bit Ubuntu, you’ll need to install a couple of 32-bit libraries the Android SDK needs to avoid the “Unable to run mksdcard SDK tool” error:
sudo apt-get install lib32z1 lib32ncurses5 lib32bz2-1.0 lib32stdc++6 - Install Android Studio from Paolo Ratolo’s repo:
sudo apt-add-repository ppa:paolorotolo/android-studio sudo apt-get update sudo apt-get install android-studio - Run Android Studio and add it to the launcher:
/opt/android-studio/bin/studio.sh - If you need to, install git
sudo apt-get install git